Regular nail trimming is an essential part of your dog’s grooming routine. Long nails can cause discomfort, affect posture, and even lead to joint problems over time. While many pet owners feel nervous about trimming their dog’s nails, the process can be safe and stress-free with the right approach. This step-by-step guide will help you trim your dog’s nails at home with confidence.
Why Nail Trimming Is Important for Dogs
Dogs’ nails grow continuously and don’t always wear down naturally, especially in indoor or less active dogs. Proper nail care:
Prevents pain and pressure on paws and joints
Reduces the risk of nail splitting or breaking
Improves balance and walking comfort
Minimizes scratches to floors and people
Most dogs need nail trimming every 3–4 weeks.
Step 1: Gather the Right Tools
Using proper tools ensures safety and comfort.
Dog nail clippers (scissor-style or guillotine-style)
Nail grinder (optional) for smoothing rough edges
Styptic powder or cornstarch to stop bleeding if needed
Treats for positive reinforcement
Avoid human nail clippers, as they can crush the nail.
Step 2: Choose the Right Time and Place
Timing and environment matter.
Trim nails when your dog is calm, such as after exercise
Choose a quiet, well-lit area
Sit comfortably and keep your movements steady
A relaxed dog is easier to handle and less likely to resist.
Step 3: Help Your Dog Feel Comfortable
Before trimming, let your dog relax.
Gently touch and hold your dog’s paws to build familiarity
Speak calmly and reassuringly
If your dog is anxious, trim just one or two nails at a time
Patience is key—never rush the process.
Step 4: Identify the Quick
The quick is the sensitive part of the nail containing blood vessels and nerves.
In light-colored nails, the quick appears pink
In dark nails, trim small amounts gradually
Only cut the curved tip of the nail
Cutting the quick can cause pain and bleeding, so proceed carefully.
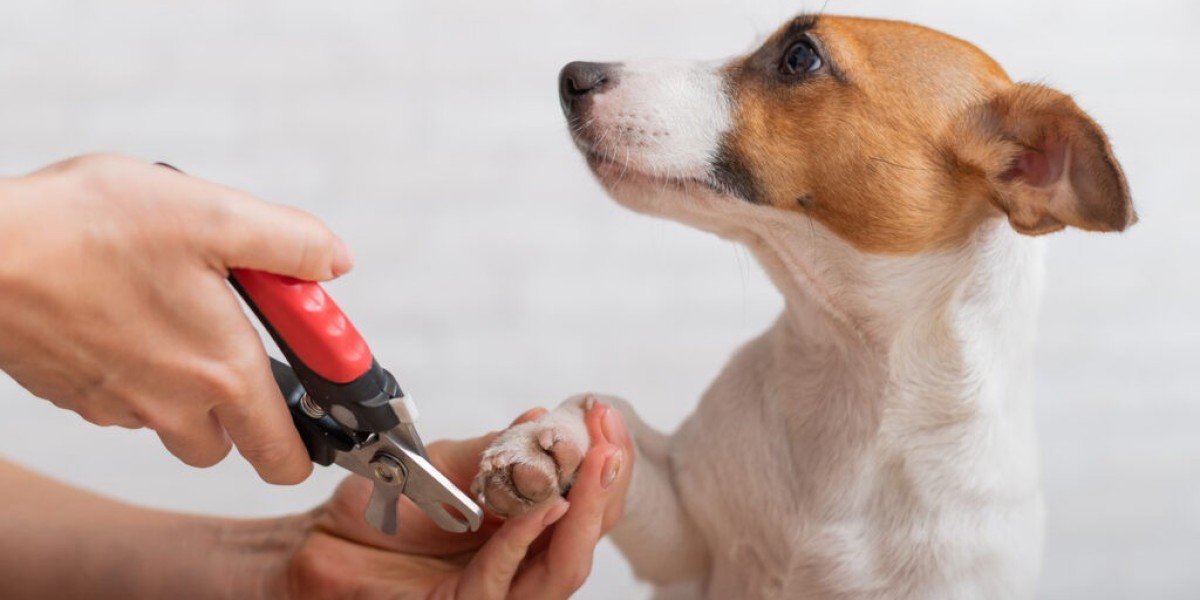
Step 5: Trim the Nails Correctly
Follow these steps:
Hold your dog’s paw gently but firmly
Position the clippers at a slight angle
Trim a small portion of the nail tip
Repeat for each nail, including the dewclaws
Take breaks if your dog becomes restless.
Step 6: Smooth Edges if Needed
If your dog’s nails feel sharp after trimming, use a nail grinder or file to smooth the edges. This helps prevent snagging and scratching.
Step 7: Reward and Praise Your Dog
Positive reinforcement makes nail trimming easier over time.
Offer treats after each paw or nail
Use praise and gentle petting
End the session on a positive note
This builds trust and reduces fear in future sessions.
What to Do If You Accidentally Cut the Quick
Accidents happen, even to experienced pet owners.
Stay calm and apply styptic powder or cornstarch
Apply gentle pressure for a few seconds
Comfort your dog and stop trimming if needed
If bleeding continues, contact your veterinarian.
When to Seek Professional Help
If your dog becomes aggressive, extremely anxious, or you’re unsure about trimming, a professional groomer or veterinarian can safely handle the task. This is especially helpful for large breeds or dogs with very dark nails.
Final Thoughts
Dog nail trimming’s nails at home doesn’t have to be stressful. With the right tools, patience, and a calm approach, you can keep your dog’s nails healthy and comfortable. Regular nail care supports your dog’s mobility, posture, and overall well-being—making it a vital part of responsible pet ownership.